Now that we have covered a
milk carton with paper let's slip the paper off and make a house.
I love using both the square bottom section of the carton and the pointy top to make one of these houses. You make these house in three phases. First the walls, then the pointed part of the house above the walls, then the roof.
Start with the walls, doors and windows:
Make enough pulp for at least two 5 X 7 sheets of paper made in the
Medium Pour Mold. For
basic paper making instructions visit the Arnold Grummer Website. Make the pulp in batches, then combine the batches in a container, that way all the components with be the same color.
 |
| Make a template of the house walls, it will take two sheets of 5 X 7 paper to cover a half gallon carton. Make a seperate template for each sheet of handmade paper |
 |
| Cut out the doors and windows on the template, place it in your frame. Place blocks where the doors and windows will be. REMOVE TEMPLATE, LEAVE THE BLOCKS IN PLACE. |
 |
| Hold the blocks in place while pouring in the pulp. This may require three hands. |
 |
| Drain the paper as usual, leaving the blocks in place. Once drained, remove blocks and sponge and couch as ususal. |
 |
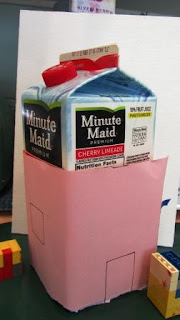
| Wrap the wet sheet around the bottom of the carton. |
Now make the pointed section of the wall:
Try to mimic the angles on the top section of the carton.
Using the
pulp painting technique, make the triangle shape with some kind of straight edge. I used a ruler, an extra white grid and a section of paint stirrer. Place these on top of a black screen/ white grid set-up. Pour the same color pulp you used for the walls to make the triangle.
Sponge the triangle, then place it on the carton. Overlap the wall a bit and press the triange and wall sections together where they overlap. Repeat on the opposite wall.
Dry in place.
The roof:
When the walls are completly dry, slip a knife between the paper and the carton to gently loosen the house from the carton. Slide the house up the carton until the peak of the triangle section is aligned with the top ridge.
Make the roof with a contrasting color of pulp. Measure the house to see how big a sheet you need for the roof. To make a smaller sheet of paper, use a section of paint stirrer to make a smaller pour mold.
You will want the roof to overhang the house on all four sides.
Place the wet sheet of paper over the top of the carton. Press the edges into the wall and triangle sections of the house. Dry completely.
When the roof is dry, slip the entire house off of the carton. The roof might not stay attachted to the house when you take it off the carton, but you can just set it on top of the walls once it is off the carton.
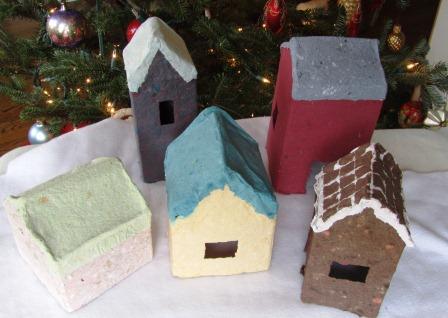
To make the snowy gingerbread house roof, I added a layer of brown pulp to the white roof.
To get the tile effect, I placed an extra white grid on top of the black screen/white grid set-up used for pulp painting. I poured the pulp into each of the grid squares. Then I placed the wet squares onto the wet white sheet I made for the roof.
Have fun. I would love to see what kind of house you make!


.JPG)